Synology Do You Need to Buy Packages Again After You Bought Them
Summary :

Synology NAS can be used equally a backup center for function or home PC. How to back up the Synology? Unlike cases have unlike methods. This post introduces some useful tools such as MiniTool Software for you to practice the Synology NAS backup. Keep on your reading.
Quick Navigation :
- Instance 1: How to Back up Computer to Synology NAS
- Case 2: How to Back up Synology NAS to a Dissimilar Destination
- How to Restore the Backup File on Computer
- How to Admission Files on Your Synology NAS Drive?
- Bottom Line
- Synology Backup FAQ
- User Comments
Synology NAS is created by Synology Inc. Information technology centralizes data storage and fill-in, simplifies file collaboration, optimizes video management, and secure network deployment to facilitate information management. Information technology can too exist put at your abode for daily use. Then, let'due south see how to practise the Synology fill-in.

QNAP vs Synology: which is a better choice for yous? This post volition bear witness you a comparison of them and help y'all to find the answer.
Example i: How to Support Computer to Synology NAS
First, nosotros will innovate how to dorsum upward figurer to Synology NAS. There are 3 options for you lot.
Selection i: Synology Bulldoze Client
Option 1 for yous to use is Synology Drive Client, which is a piece of software developed past the Synology company. Synology Drive Customer is a solution for file management, sharing, and synchronization. Here is how to practice the Synology backup using information technology.
Step i: Go to the Synology Download Eye to download the Synology Drive Client and install it.
Annotation: You demand to install the Synology Drive Server on your Synology NAS in advance to run Synology Bulldoze Client. To do that, refer to this postal service - How to set up connection to Synology Drive server.
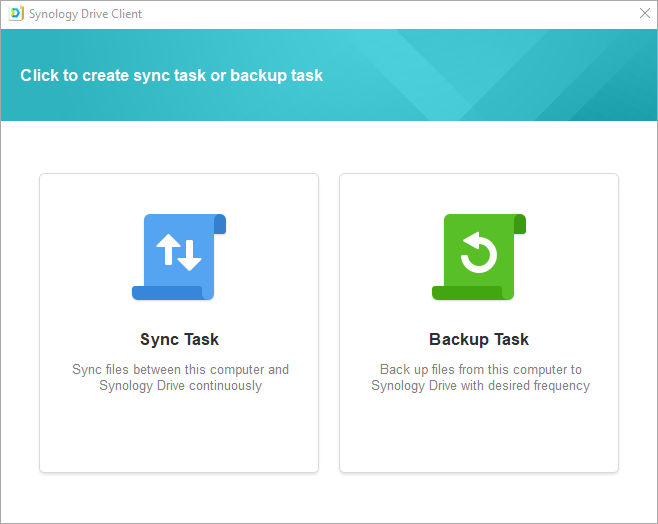
Footstep 2: Later on the installation, you lot should launch it and click Kickoff now.
Pace 3: In this interface, y'all should click the Backup Task part.
Step iv: Enter the address or QuickConnect ID, username, and countersign of the Synology NAS running Synology Drive Server.
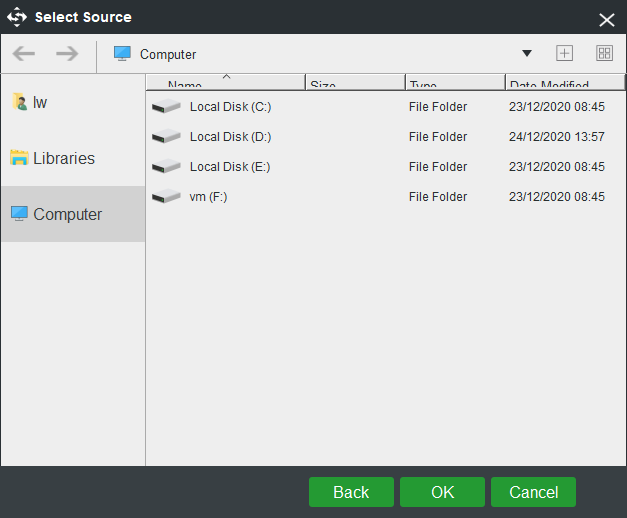
Step 5: Next, you tin can choose the backup source and backup destination here. Then, click Next to continue.
Pace vi: Select a fill-in mode and click Next. Then, view the summary of your backup settings and click Done.
And then, you just need to wait for the backup process to be completed.
Option 2: MiniTool ShadowMaker
Choice 2 for you is to use the free fill-in software - MiniTool ShadoMaler to do the Synology backup. Information technology is a professional backup program that can be used to support the operating system, disk, partitioning, file, and folder. Too, it is a convenient program to protect your figurer and data.
MiniTool ShadowMaker supports well-nigh all storage devices that tin exist recognized past Windows, such as HDD, SSD, USB external disks, Hardware RAID, NAS, Home File Server, and and so on.
It is as well a clone tool that can help you to clone the OS from HDD to SSD without data loss. So, also creating a system paradigm, you can too choose to clone the Bone disk to some other hard bulldoze to safeguard your PC.
Now yous can download and try MiniTool ShadowMaker to back up your PC to the Synology NAS.
Gratis Download
Footstep 1: Launch MiniTool ShadowMaker
- LaunchMiniTool ShadowMaker.
- ClickKeep Trialto keep.
Footstep ii: Select Backup Source
- Go to theBackupfolio after yous enter its main interface.
- And so click theSourcemodule to cull the backup source.
- ChooseFolders and Filesand cull the files yous want to back up to the Synology NAS.
Step 3: Select the Fill-in Destination
- Click theDestination module to continue.
- MiniTool ShadowMaker provides four destination paths to be chosen. Here, you need to click the Shared tab.
- Click the Add together new button, and type the path, user name, and password to connect your NAS device.

Step 4: Showtime to Support
After selecting the backup source and destination, you can clickBack up Now to perform system fill-in immediately. Or yous can clickBack up Afterward to delay the process.
Tip: You can also use the Sync feature of MiniTool ShadowMkaer to sync your files to the Synology NAS.
Subsequently all of the steps are finished, you take successfully backed up your files to the Synology fill-in device. With MiniTool ShadowMaker, you can provide amend protection for your computer and keep it safe.
Tip: If you lot encounter some bugs when using the program, you tin contact united states of america and we will reply to you as soon as possible.
Option 3: Windows Built-in Tool
Option three is to apply the Windows built-in tool to do the Synology NAS backup. You tin can follow the instructions beneath:
Stride ane: Typesettings in theSearch box to open up theSettings application. Then navigate to theUpdate & Security section and click it.
Step 2: Click theBackup section and clickMore options.

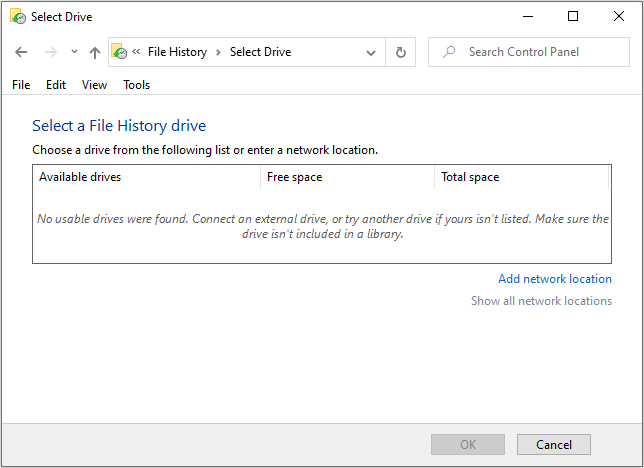
Step 3: In theBack-up options window, you lot should clickSee advanced settings. Then clickSelect drive.
Step four: In theSelect a File History drive part, y'all can continue to chooseAdd network location.
Stride 5: Enter the network address. You tin can also provide the name for the NAS device and clickSelect Folder.
Stride vi: Select the backup folder, select the backup path, and clickOK andEnable. So, clickBack up now.
Tip: In the fill-in options, you can set the backup time, continue the fill-in time menses, add together folders that need to be backed upwardly, and delete the folders that exercise non need to exist backed up.
Then, you take done the Synology backup successfully.
Windows x Backup not working? Two cases are introduced here: Fill-in and Restore (Windows vii) non working, Windows 10 File History not working.
Case two: How to Support Synology NAS to a Unlike Destination
If yous desire to back up Synology NAS to a unlike destination, Hyper Backup can help you. Synology Hyper Backup is the product of Synology company. Hyper Backup supports bankroll up Synology NAS to local shared folders, external storage devices, remote Synology NAS, file servers, and cloud services.
Step 1: Log in to DSM (Diskstation Managing director) and download the Hyper Backup parcel from the Package Center.
Footstep 2: OpenHyper Fill-in and click the+ icon on the bottom left corner to selectData backup task.
Step 3: Then, cullRemote NAS device or one of the options in theFile Server section based on your needs and click Next to proceed.
Step four: On theBackup Destination Settings page, selectCreate backup task and enter the information required to connect with other NAS devices or file servers.
Step 5: Then, select a shared folder equally the fill-in destination. Subsequently that, you can choose the backup source.
Step 6: Next, you can practice some backup settings. If you don't need them, you can skip them. So, follow the instructions and click Yep to beginning the fill-in process immediately.
How to Restore the Fill-in File on Calculator
If y'all desire to restore the backed up files on the computer, you lot can refer to this role.
Synology Drive Client
Hither is how to restore the backed upwards files in Synology Drive Customer.
Step 1: OpenSynology Drive Client, go toBackup task and clickRestore.
Footstep 2: Select the file y'all want to restore and click Restore. Alternatively, you can select the file and download the file to a specific destination, then click download.
Step 3: Then, you have restored the backed upwards files successfully on your calculator.
MiniTool ShadowMaker
Now, let's see how to restore the backed up files with MiniTool ShadowMaer on the computer.
Step 1: Launch MiniTool ShdowMaker. In the Restore tab, select the file backup image you want to restore and click the Restore push button.
Tip: If the desired backup is not listed hither, clickAdd together Backup located at the elevation right corner to select the file backup prototype manually.

Step 2: In the adjacent window, select the file restore version and click Next. Then, bank check the files/folders to restore and click Next.
Footstep 3: Now, click Browse to choose a destination location to relieve the restored files.
Pace 4: And so, the plan will start to restore your files and you just need to wait for it patiently. When the process is finished, you lot will receive a message – The operation is completed successfully.
After reading this mail, I have learned how to back up Synology NAS and how to restore the backed up files. Click to tweet
How to Access Files on Your Synology NAS Drive?
NAS drive is a kind of network drive, which allows its contents to be accessible for all your devices within the same LAN and fifty-fifty remotely over the Internet. Here is how to access files on your Synology NAS drive.
Step one: OpenFile Explorerpast correct-clickingStart and selectingFile Explorer from the menu.
Step 2: SelectThis PCtab from the left panel. In the chief interface, yous'd better note the bulldoze letters which have been assigned to the existing drives since these letters cannot be assigned over again to the network drive.
Pace iii: Nether the Computer tab, clickMap network drive from the upper tool console and selectMap network drive from the drib-down menu.
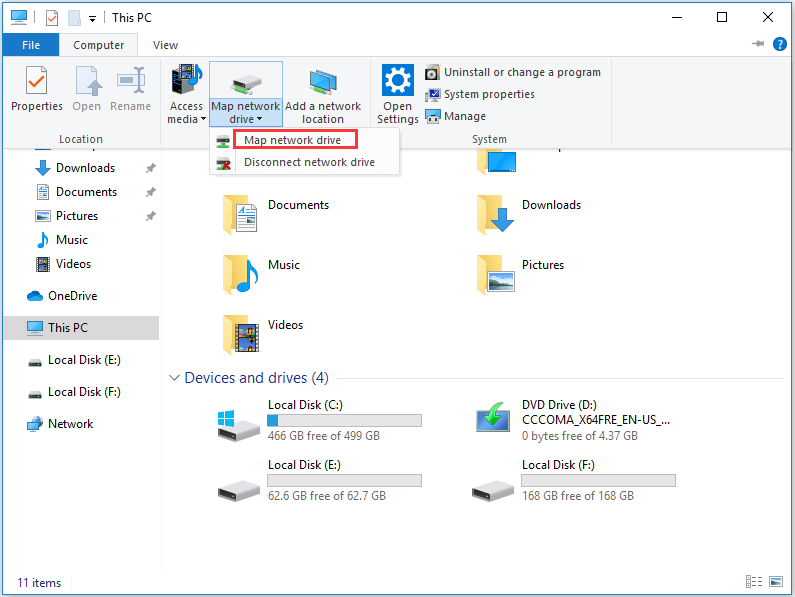
Step four: In theDrive list, select a drive letter you want to assign for the network drive. In theBinder box, input the path of the network folder you desire to map. Alternatively, you lot can click theScanbutton to find the target from the pop-up menu.

Tip: The Reconnect at sign-in option is checked by default, which allows connecting the network drive every time yous log on to your estimator.

If y'all are looking for solutions to gear up the mistake can't map network drive Windows x, this postal service is what you need.
Bottom Line
To sum up, this post introduced how to do the Synology fill-in and how to restore the backed upwardly files. If you accept whatever different ideas for Synology fill-in, you tin can share them in the comment zone. If you have any problem with MiniTool ShadowMaker, please feel free to contact us via the e-mail[email protected] and we will reply to you every bit before long as possible.
Synology Backup FAQ
How to backup Synology NAS to Google Drive?
- Brand sure theDiskStation is runningDSM 6.0 or higher up.
- DownloadSynologyCloud Sync and launch it.
- Then, select Backup and CloudSync. Adjacent, click Install.
- Afterwards the installation is finished, click Open under Deject Sync.
Does a NAS have to be connected to a router?
Although most NAS devices require an Ethernet connectedness to your network router, some models provide a built-in Wi-Fi wireless connexion and practice not crave a concrete connexion to the router.
Is it worth buying a NAS?
It's worth buying a NAS. Although information technology'southward a little expensive, all computers connected to the router can access your data at the same time every bit long as the NAS is connected to the dwelling house/office network.
What is the default IP accost for Synology NAS?
The default IP accost of most Synology routers is 192.168. one.1.
Source: https://www.minitool.com/backup-tips/synology-backup.html
0 Response to "Synology Do You Need to Buy Packages Again After You Bought Them"
Post a Comment